Showing posts with label Gardening. Show all posts

Wednesday, February 24, 2010

How to store seeds?

0 comments

  • After collecting seeds from the garden (from herbs, vegetables and flowers), dry seeds at room temperature on racks or on large sheets of paper for about a week to ensure they hold no moisture.
  • After drying, separate the seeds from their seed pods or flower heads by shaking them into large paper bags. Sift out the seeds from any dried plant bits and pour them into recycled paper envelopes or print off some paper seed packets. Mark on the seed packets the type of plant and the date seeds were harvested.
  • Next take a kleenex tissue and pour about 1 tablespoon of powdered dry milk in the center, fold the tissue up so you have a little packet, place this in the bottom of a clean glass jar. The powdered milk will act as a desiccant inside the jar and help to absorb moisture so the seeds have a dry environment.
  • Next fill the jar with your seed packets and seal the jar shut.
  • Keep the jar in a cool dark place to keep the seeds dormant, the back of the refrigerator is an ideal location.
Tips:

  • Collect the seeds when it’s dry and sunny several hours after the morning dew has disappeared (early afternoon), the less moisture the better.
  • Once you’ve harvested the seeds, avoid keeping them in a humid room while they’re drying at room temperature (even the kitchen can be too humid because of the cooking activity).
  • If you have long winters and the seeds will be stored for several months, replace the dried milk packet once or twice with a fresh packet.

Monday, January 11, 2010

Rosy Tips

0 comments

A rose is a perennial flower shrub or vine of the genus Rosa, within the family Rosaceae, that contains over 100 species and comes in a variety of colours. The species form a group of erect shrubs, and climbing or trailing plants, with stems that are often armed with sharp prickles. Most are native to Asia, with smaller numbers of species native to Europe, North America, and northwest Africa.

1. Roses need lot of potassium. So old bananas or their skins are great manure.

2. Milk say 1 tbsp diluted with water can be sprayed on Rose plants to avoid getting infected.

3. Water your roses amply after planting them and dont forget to add a lot of compost manure.

4. Tea dust or leaves are great when added to the soil near the roots.

Wednesday, December 23, 2009

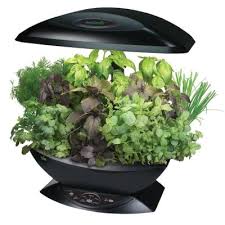
Herb Gardening Tips

0 comments
We all know and love herbs. Chances are that you've already used a product today that has an herbal ingredient. The soap you showered with this morning used lavender for its scent. Since you are reading this, you're probably ready to take the next step and start your own herb garden. You'll have fresher, more flavorful herbs, and it's a lot of fun. Enjoy! But before that here are a few tips to have a lovely herb garden.

1. To encourage parsley to sprout more rapidly, soften the seeds by soaking them overnight in warm water.
2. Thyme plants should be started from seed every two to three years. Older plants are poor in quality for cooking or other uses.
3.
Harvest mint often to encourage vigorous growth - but grow it in a container or it will take over your garden.
4.
The best time to harvest herbs is early in the morning on a sunny day.
5.
Make successive plantings of chervil if you want to harvest it all summer.
6.
Rubbing lavender leaves with your hands can remove strong odors, like garlic or onion.
7. Many herbs like dill and sage self sow if the flowers are not removed.
8.
Add comfrey to the compost pile. Its leaves are rich in nitrogen and help break down organic materials.
9.
Mints need more water than most herbs. They want fairly moist but not soggy soils.
10.
Mulching around herbs will discourage weeds and maintain the moisture level of the soil.
11.
In many cases, adding garden compost to the upper surface of the soil in the spring is all the fertilization herbs will need for the year.
12.
If you're interested in companion planting, try basil next to tomatoes. It really helps to slow down the bugs.
13.
In general, collect herbs for cooking right before they flower. This is when they have the most flavor.
14.
Seeds often take longer to dry than the leaves, up to 2 weeks for larger seeds. Place seed heads on dry paper cloth. When they really start to dry out, rub the seeds gently between your palms removing dirt and hulls. Then spread the clean seeds in thin layers on cloth or paper until completely dry.
15.
Another way you can dry herb seeds is by hanging the plant upside down inside a paper bag (make sure its paper! Plastic will hinder drying). The bag will catch the seeds as they dry and fall from the pod.
16.
When storing herbs don't use a paper or cardboard container. This material, over time, will absorb all of the aromatic flavor.
17.
If you don't trust your seed starting skills, one of the best places to get organically started herbs and other transplants is your local farmers market. Quite often the person selling them is the person who grew them in the first place.
18.
Anise and basil are just some of the herbs known to attract beneficial insects to your garden.
19.
Herbs are a great candidate for your first foray into formal gardening. Try an English knot garden with your favorites.
20.
Do not use garden soil as a potting mix in containers. It may drain poorly and is likely to contain insects, diseases, and weed seeds.

Thursday, August 6, 2009

Container Gardening

0 comments
Container gardening is popular among those living in apartments or for those who otherwise have limited yard space. Container gardening is a way to have fresh vegetables during the summer without using
much outdoor space. The only things you need for successful container gardening is some containers, soil, sun and a few garden seeds or plants.

Start with the containers, which can range from expensive decorative flower pots to old plastic dish pans. The containers just need to be stable enough to hold soil, deep enough for garden plant roots to grow in and have a drainage hole in the bottom.

Fill your containers with a professional planting mix or make your planting mixture yourself using 1/3 sand, 1/3 loam and 1/3 compost.

You can start your container gardening project with vegetable seeds or plants. If it's early in the growing season, garden seeds are much cheaper than garden plants, but if you want fast results, chose garden plants.

When you purchase plants for your container garden, look for garden plants that are green and have healthy foliage. By pass any garden plants that are withered.

Plant you garden plants (or seeds) and place them in an outdoor location that will receive plenty of sunlight, yet be protected from the wind. An apartment patio, porch or rooftop is the ideal location for container gardening.

Water your young garden plants thoroughly and protect them from direct sunlight for the first few days. The garden plants still need sunlight, just not direct sunlight. The garden plants need a couple of days to recover from the shock of planting and adjust to their new soil home.

Check your container garden daily for soil moisture. Container gardening will require diligent watering, since container soil will dry out faster the ground level soil.

Most garden vegetables are suitable for container gardening. Tomatoes, cucumbers, peppers, squash, onions and lettuce are some of the popular, easy to grow vegetables for container gardening. Hybrid bush varieties of vegetables are more compact and better suited for container gardening than traditional varieties.

Limited outdoor space doesn't mean you can't have fresh garden vegetables, give container gardening a try.

Thursday, July 2, 2009

Watering the Bonsai Tree

0 comments

We thought of having our first post dedicated to nature. Lots of us love gardening and bonsai plants are a favourite as they they less space and cute little things. The most important challenge is in watering these plants. We are claiming to be experts in this area. We are just writing down whatever instructions that we came across from our friends and family.

This is the crux of the art of bonsai. Most trees that die (I prefer the phrase “permanent dormancy”) are lost to dehydration, either from lack of watering or from being kept in a low humidity environment (indoors) too long.

Different soils dry at different rates, trees differ from species to species in water requirements and even different styles of pots dry out at varying rates, so each pot must be checked regularly until you become more familiar with the plant in question. The other end of the spectrum, over-watering can damage plants nearly as quickly; it is in finding the proper balance of soil, water and air that you will develop a healthy root system and thus a healthy bonsai.

Watering accomplishes three things for your bonsai.

  • First, and most obviously, it provides H²O for your tree.
  • Secondly, the water that flows through the soil carries nutrients your plant needs and washes out the excess salts that might otherwise build up.
  • Third, and least obvious, the flow of water pushes out the old, spent gasses in the soil and pulls in new, fresh atmosphere.

People are conditioned to believe all the plants transpiration takes place in the leaves, but if that was true, how would a plant that was totally cut down spring back from the roots? The first few inches of soil are crucial to all of a plant’s functions; even a mighty oak does most of its feeding and drinking and much of it’s “breathing” in the top foot of soil. It is this reliance on a shallow soil profile that allows us to grow trees in such shallow pots in the first place. The porous quality of bonsai soil allows for quicker water flows and better gas exchange; this is why bonsai soil is so granular; it helps develop a dense mat of roots to support a dense mass of foliage.

Bonsai watering basics
Some quick watering tips:

The old Japanese adage is to water three times; once for the pot, once for the soil, and once for the tree. By going back and forth over your collection three times it allows the water to soak into the soil and the pot and leave water for the tree to take in.

Don’t just water the soil. All parts of a plant absorb water to some degree; 35% of the water intake for a plant doesn’t involve the root system at all. Washing off the foliage also keeps dust and pollutants from clogging stomata or breathing holes in the plant’s leaves.

Sure it’s raining, but is it enough to get good flow-through? Better safe than sorry; water anyway. Been raining all week? Prop up one end of the pot a few inches to increase drainage.

Using the hose to water? Too much water pressure can blast soil out of pots; be sure to get an adjustable spray nozzle to allow for different needs (Get one with a mist setting; it’s great for occasional wash downs of the foliage). Keep in mind that if that hose has been lying in the sun for a few days, that first blast can boil a tree (literally!).

Once a week or so, water by totally immersing the pot in water until the bubble trail quits. This assures top to bottom watering and lets the pot and soil soak up their maximum holding capacity, making it easier to keep them watered during the rest of the week. (I think this is the best tip in here, especially for novices)

Water early in the day. If you must, water late in the day, but be aware that leaves your plants more vulnerable to fungus and slugs. Plants don’t transpirate (breathe) above 85°, so when you water in midday, you temporarily cool the leaf enough to start transpiration, which allows the moisture inside the leaf to escape in the “exhalation”; kind of counterproductive. AND the water sitting on a leaf in the midday sun can act as a lens, burning leaves. So watering early AM beats all these problems and gives you a few uninterrupted minutes with your trees, and that can be a real stress beater!

If you have flowering bonsai, don’t water the flowers; it’ll make them pass almost instantly…

This is the most important part of bonsai care. Watering is a learned skill; in Japan an apprentice is given pruning shears on his first day but he won’t touch a watering can for another four years!

Blog Widget by LinkWithin
Parenting

Followers

Tweet Tweet

Brag Badges


Woman Talk Copyright 2008 Fashionholic Designed by Ipiet Templates Supported by Tadpole's Notez